Friday, January 27, 2012

Minor bathroom redo

It's been more than three months already since we moved into our house. We painted like crazy at the beginning and I've been crafting ever since, but now we'll be moving into some more substantial improvements. Our first one was this past weekend, when we swapped out the tiles on the side of our bathtub to make them more modern and to match the new wall color better. As with most projects, this was more involved than we first realized, but I like the updated version so much better. And, it gave us a pressure-free way to practice mudding and grouting some tile before we get into the much more involved project - completing remodeling our upstairs bathroom (more on that below). 

The before picture benefits from the realtor's wide-angle camera and better flash, but I assure you, even though it looks darker, the after is so much better!


As I mentioned, this little project is just the warm up for a big undertaking we'll be starting in February, which is to completely gut and redo our main bathroom. We're talking gut with a capital G - we're even redoing the sheet rock to get rid of the odd texturing thing you can likely detect below, taking down the one wall, adding pocket doors to free up wall space, etc. etc.

Again, this picture benefits from originally being taken by a realtor, but hopefully you can still capture all of its retro glory, though you can't see the cracks in the sink, etc. I cannot wait for our new bathroom! Check out my Pinterest board dedicated to the bathroom redecoration to get a sense of what I'm going to try to do in there - mustard yellow and gray all the way! :)

Sunday, January 22, 2012

Another dresser re-do!

After learning a lot from my first furniture refinishing project, I've been on the lookout for another piece I could bring back to life in much the same way, but this time list in my window shop. Much like house hunting was this fall, learning to see the potential in something that is less than beautiful at the moment is an acquired skill, and it's something I'm still working on. But, a few weeks ago I found the right dresser on which to replicate my paint swatch technique:


I used the same process as with the last dresser...


... and feel like I got another good outcome! This one is available in my window shop for anyone based in the Twin Cities who is interested - I can only have so many of these in the one room of my house where they fit the color scheme! :)


Sunday, January 15, 2012

On the chevron bandwagon

I love all the chevron stuff out there right now. I'm planning on incorporating it into our bathroom after our remodel, but for now I'm paying tribute via this string/nail art rendition.


To do this project I simply found various chevron patterns available via Google Images, and sized and cropped them to fit my wood pieces, and to create a grouping where the middle piece could be the most "busy," while the other two could feature smaller designs. The sky is the limit on the potential combinations one could do.

Here they are at home in my guest room...


Sunday, January 8, 2012

L-O-V-E

Anyone who has seen the LOVE sculpture in Philly, NYC, or elsewhere will appreciate this one, inspired by this brilliant blog post I found via Pinterest. In my version, the letters are anchored on a 20x20 white canvas. I'm using this to fill a large wall in my living room and it's perfect. If you want one but don't want to DIY, just visit my window shop.


Friday, January 6, 2012

Wedding monogram

It's been more than four years, but I'm still in love with the wedding monogram I designed for our wedding and subsequently incorporated everywhere I possibly could. The colors for our actual wedding were black and white so the monogram was our only "theme," and our reception in our hometown was fall themed so there I added some fall elements. In any case, here are all of the monogram items from that great day.


The invites I designed: tri-fold on linen black cardstock with Stardream (shimmery) cardstock elements. Separate insert cards for the ceremony, reception, and to RSVP:


Our wedding programs - Stardream black cardstock and Stardream ivory paper:


Our monogram on everything!


Candle lanterns, created by painting and glueing together four square picture frames from
Michael's, then printing our monogram on vellum:


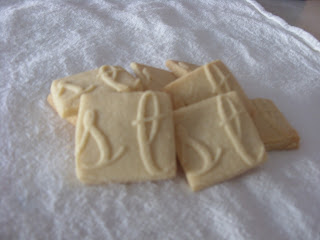
Monogram-stamped spritz cookies inspired by these from Martha Stewart Weddings. I created two sizes of these and ordered from Rubberstamps.net.


Made my own monogram stickers using full sheet sticker paper, available at office supply stores.


Finally, our placecards were personalized wine charms for each guest, to align with our dinner at a small Italian restaurant in St. Paul, MN. I printed on Stardream cardstock for these, and used tag-making supplies from Michael's Crafts to create the charms:

Wednesday, January 4, 2012

Hello, beautiful!

I may or may not be guilty of saying this out loud to this vintage modern dresser I just refinished and am now proudly displaying in my guest room. I took inspiration from the various paint-swatch furniture out on Pinterest - particuarly this beauty (I got pretty close, didn't I?). 


Huge improvement considering where she started out:


It took all of this to make the transformation possible:


She looks fab paired with the sunburst mirror I recently finished and hung!


Miscellaneous projects

I've tackled a number of other, smaller projects lately, including:

A yarn ball wreath for Christmas. There are so many iterations of this out on Pinterest, but this one was inspired from this version on CountryLiving,.com. The only difference in mine is that I used 10 instead of 12 of the 2 1/2" balls. I love this so much that I'm trying to justify leaving it up for a few more weeks now that Christmas is over.


And, here's my take on the Scrabble letter-based coasters you often see online, such as here:


Finally, my obsession with no-sew pillow covers continues with these two flowery pillows, using very clearance but nonetheless gorgeous silk fabric from Jo-Ann’s:

Tuesday, January 3, 2012

Rays of light

There is no shortage of sunburst mirror tutorials out there, and like most of my projects, the one I made is a combination of a few things I've seen out there. It's primarily based on this tutorial from Crazy Wonderful based on wood shims, but I made three specific changes to mine:

1. I chose to make the bursts on mine all consist of five shims each, and I used 12" shims. I glued each together with Gorilla Glue, then used masking tape to bind each grouping tightly together until they dried. Here's just one of my "bursts" of five shims:


2. I wanted a mirror that was more minimal than the one on Crazy Wonderful, so I just bought an unframed one from Jo-Ann Fabrics.

3. The most important difference is that I used gold leaf on my mirror. I started out by spray painting the assembled wood shims with gold paint but it still looked very wood-like to me, and it was hard to get a nice look even after sanding down the glue that seeped out during the gluing process. They gold-leafed a DIY sunburst mirror on one of my favorite HGTV shows, The High-Low Project, so I gave it a whirl too. Gold leaf sheets are pretty easy to apply. They come in a book of 25 sheets, and you also need to buy the adhesive spray. I got mine from Michael's Crafts.


Here's another take on the sunburst mirror, and a much lighter version at that, recently completed by my crafty friend, Mel. Finally, this is what my mirror looks like on the wall in our guest room. It's made even more beautiful paired with the dresser I just refinished. More on that in my next post!


Hammering to my heart's content

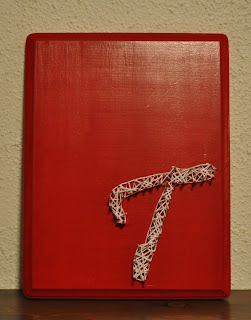
I've been going crazy over nail and string art since seeing the many iterations out on Pinterest. Here are just a few of the creations I've made thusfar, with many more to come - I just can't resist! Customized string art is available for sale via my window shop as well.  


Click here to see another impressive version, made by my friend, Mel.

Sunday, January 1, 2012

Impressive ruffle pillows

This pair of felt ruffle pillows kept me busy for several days during my Christmas vacation this year. I based them off this great tutorial on The Etsy blog.


That said, I made two modifications to the approach outlined on Etsy:

1. The main cover is a no-sew model as outlined here, but folded and pinned in back rather than knotted:


2. Rather than sewing the ruffles onto the cover itself, I cut out a piece of felt to the size and shape I wanted, then sewed the ruffles to that instead. This will enable me to remove the ruffles and simply wash the fabric cover when needed.


The Etsy Blog warns that you'll use a LOT of felt circles, and they were right! I used about 90 for each pillow. I was able to make pretty quick work of it by tracing circles that measured just under 3" across from a mug using a regular ballpoint pen on the felt. A sharp scissors is also key to staying sane cutting out all those circles.


I really love these pillows, and am going to try making some using longer pillows, like those shown on The Etsy Blog, sometime soon!